Adding Associations
To associate a catalog item to a primary catalog item:
1) Click on  for System Console
or Tools->System Console.
for System Console
or Tools->System Console.
2) Click on  for
Product Catalog. The following items are listed.
for
Product Catalog. The following items are listed.
3) Click on  for
Catalog Entries. The following is displayed.
for
Catalog Entries. The following is displayed.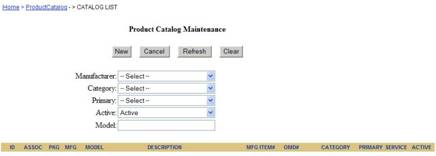
4) Set the drop-down search fields to the Manufacturer
and equipment Category of the item you want to modify. Also identify whether the
item is Primary equipment and whether it is active in the catalog. Click
Refresh.
A list of items matching the search values is displayed in
the list.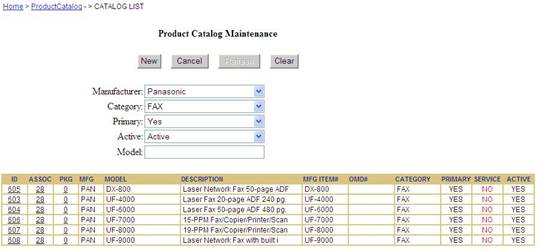
5) Find the item and click on the ID of the
item. The catalog maintenance form is displayed. 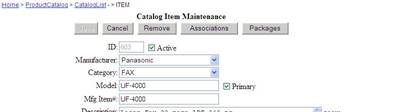
6) Click on the Associations button. The Product
Association Configuration page is displayed. Any associations that already exist
for the primary (parent) item are listed under
Existing Associations.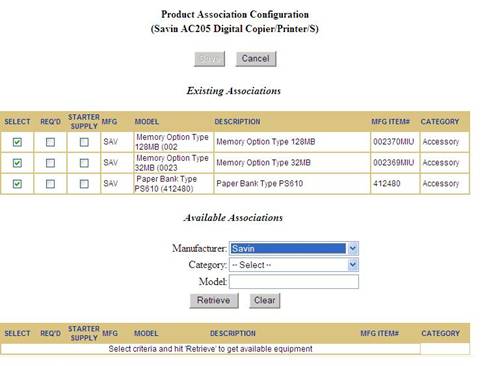
7) Under Available Associations, select the
product category of the item to be associated with the primary (parent) item in
the Category field and click on Retrieve. A list of items for that
manufacturer and category is displayed.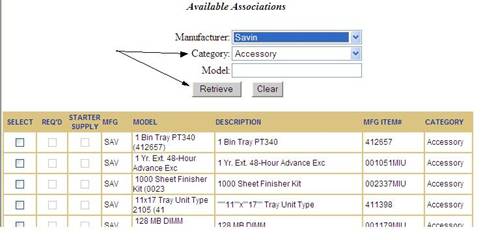
8) Click on the box under SELECT for each item to be associated with the parent item.
9) Once you have selected an item, you may also check if the item is required for the parent (REQD) and/or if the item is a STARTER SUPPLY.
10) When you have selected all the items, click on
Save at the top of the page.
The selected items will now be
associated with the primary item and shown in the Existing Associations
list.
11) Click on Cancel to exit each page until you reach the System Console.